Users Guide: How to Put On a Wig

So, you’ve finally decided to take the plunge and purchase your first wig? Congratulations! Buying a wig is an exciting decision that could completely revolutionise your life. Whether you’ve opted for a short and sweet feathered wig like Raquel Welch or a long and luscious wig like Kim Kardashians, the way to properly put on your wig from the Joseph’s WIgs Collection will be exactly the same. Not sure where to start? Don’t worry, we’re here to help! Here is our step by step users guide to putting on your very first wig, depending on whether you are rocking a full head of hair under your wig or whether you have a smooth bald head below:
Putting a Wig Over a Full Head of Hair
You will need:
– Wig cap
– Hair tie
If you’re planning to wear your wig over the top of your existing hair then the first thing you need to do is tie your hair out of the way. The easiest way to do this is to tie your hair into a simple low ponytail and keep it away from the back of your neck as much as possible. The more you can keep your hair close to your scalp, the cleaner the finished result will look once your wig is in place.
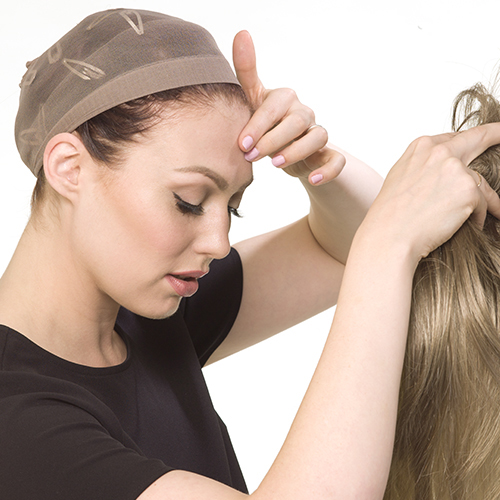
Once your hair is tied back and out of the way, you should place a wig cap over your head, securing your ponytailed hair close to your scalp. A wig cap will serve two important purposes: firstly, it will keep your hair out of the way. Secondly, it will provide grip to hold your wig in place, ensuring that it won’t fall off no matter how active you’re being during your everyday activities.
Finally, it’s time to add your wig. Start by placing it on from front to back, placing it on your forehead and then pulling it to the back of your head. Be sure to pull the back of your wig and lock it over your ponytail for extra security, ensuring extra comfort and durability for your wig.
Putting a Wig Over a Smooth, Bald Head
You will need:
– Scalp protector
– Soap and water
– Liquid adhesive
– Small adhesive brush
– Blow dryer
Putting a wig over a bald head may seem a little more complicated (and it certainly requires more supplies) but it’s actually much easier than you might think. The first thing that you need to do is prepare your head: your scalp should be washed with soap and water (something that most people should do regularly anyway) as this will ensure your head is as oil-free as possible, and will keep your wig clean for longer. Once your head is clean, we recommend that you spray scalp protector directly on your scalp. This will act as a barrier between your skin and the adhesive that you are going to use to hold your wig in place.
Applying the adhesive to your scalp is the stage that most new wig wearers are apprehensive about. But there’s nothing to worry about: your wig adhesive will wash off easily, and won’t leave any unwanted or uncomfortable residue on your scalp. Use a small brush to apply the adhesive to your scalp: apply some of this adhesive to each side of your head to ensure that your wig will attach to your scalp evenly. You may wish to blow dry the adhesive with a cool air setting for around 30 seconds to speed up this process.
Once your adhesive is feeling tacky, apply your wig from front to back (this process is the same regardless of the amount of hair you have underneath your wig). Place the front part of the wig on your forehead and press firmly with both hands for at least 60 seconds. Attach the sides to the matching areas on your scalp and press firmly again for another minute, until you can feel that your wig is holding in place. Finally, secure your wig in place at the back of your head so that you create a seal all the way around your head and can rest assured that your wig will hold up for as long as you do.
And that’s it: putting on a wig Is much quicker and easier than you might think, and then you’re ready to hit the town (or the office) and face whatever the world has to throw at you.